
To install a benefit of a Custom kayak fishing rod holder, first, choose a suitable location on your kayak and then secure the holder with bolts or rivets. Ensure the rod holder is mounted at an angle for easy access and stability.
Custom Kayak Fishing Rod Holder enthusiasts understand the value of having their gear within easy reach. A custom rod holder not only enhances the angling experience but also boosts efficiency by keeping your rod secure and ready for action. Whether you’re a seasoned kayak angler or just starting, installing a rod holder is a straightforward task that promises a great return on investment.
It’s important to select a position that doesn’t interfere with paddling or kayak stability. Precise placement and solid installation will ensure your fishing adventures are both enjoyable and productive, all without compromising the integrity of your kayak’s design.
Introduction To Custom Kayak Rod Holders
Custom kayak rod holders boost your fishing game to a new level. They allow anglers to tackle the water with ease. Tailoring the fit and positioning ensures the perfect setup. This matches your specific fishing style and kayak model. Let’s delve into the world of kayak customization.
Benefits Of A Custom Fit
- Increased Comfort: Custom holders prevent unnecessary reaching and twisting.
- Better Kayak Balance: The even distribution of rods aids in balance.
- Streamlined Fishing: Position rods for quick and efficient access.
- Protection of Gear: Secure and safe from slipping overboard.
Types Of Kayak Fishing Rod Holders
| Holder Type | Features | Best For |
|---|---|---|
| Flush Mount | Low profile, mounted on the deck | Minimalists and still-water fishing |
| Clamp Mount | Adjustable, quick to install and remove | Anglers who fish different kayaks |
| Adjustable Mount | Full motion range, versatile angles | Active kayak anglers with varied techniques |
| Scotty Mount | Strong, secure, and easy-to-use | Serious anglers in choppy waters |

Credit: www.instructables.com
Assessing Your Kayak For Installation
Before setting sail, installing a custom fishing rod holder ensures your gear remains secure. This process starts with a thorough assessment of your kayak. Proper installation avoids damage and maximizes your fishing efficiency. Let’s scope out the perfect spot for your new accessory.
Identifying The Right Spot
Location is key for a rod holder. Start by sitting in your kayak. Reach around to find spots that are easy to access. Ensure the chosen spot doesn’t hinder your paddling or fishing movements. Use tape to mark potential areas. Consider the water flow around your kayak. Avoid low areas that could submerge your fishing rod during rough conditions. A front-mounted rod holder offers easy access, while a side-mounted one allows for trolling.
Considering The Kayak’s Layout
Every kayak has a unique design. Account for the storage areas, footrests, and seating. Flat surfaces work best for mounting and stability. Avoid areas with complex curves or where the hull is thin. Check underneath for obstructions like built-in flotation devices or wiring in a pedal kayak.
Use this checklist to secure the ideal spot:
- Accessible while seated
- Doesn’t interfere with paddling
- Clear of storage compartments
- Away from foot pedals or tracks
- Secured against capsizing risks
By selecting the right location and considering your kayak’s layout, you ensure a seamless installation of your custom rod holder. And most importantly, you can look forward to a more efficient and enjoyable fishing experience on the water
Tools And Materials Needed
Tools and materials needed lie at the heart of installing a custom kayak fishing rod holder. Proper tools ensure a smooth installation. Quality materials guarantee longevity. Let’s explore what you’ll need to tackle this DIY project with confidence.
Essential Tools For The Job
Tools make or break the installation process. Below is a list of tools you’ll need:
- Drill: for creating precise holes.
- Screwdriver: to secure the holder.
- Jigsaw: If cutting is needed,.
- Measuring Tape: For accurate placement.
- Marker or pencil: to mark drilling spots.
- File or sandpaper: to smooth edges.
- Wrench: for tightening bolts.
Selecting Quality Materials
The right materials enhance your rod holder’s effectiveness. Value durability and compatibility.
| Material | Function | Recommendation |
|---|---|---|
| Marine-grade Plastic | Holder’s Body | Resistant to water and sun |
| Stainless Steel Screws | Mounting | Rust-proof for longevity |
| UV-resistant Straps | Securing rods | Prevent degradation from sunlight |
Pre-installation Preparations
Before we dive into installing a custom kayak fishing rod holder, let’s prepare. Proper setup is crucial for a successful installation. Start with safety and precise measurements for your holder’s location.
Safety First: Wearing The Right Gear
Protection is key when working on your kayak. Always wear the right gear. Follow these steps to ensure safety:
- Wear gloves to protect your hands.
- Goggles shield your eyes from debris.
- A life jacket is a must for any work near water.
- Wear non-slip shoes to avoid accidents.
Measuring And Marking The Area
Accurate placement of your rod holder is critical. Measure twice, and mark once. Keep these tips in mind:
- Pick a reachable spot from your seated position.
- Use a tape measure to find the perfect place.
- Mark the spot with a waterproof pen.
- Double-check measurements for confidence.
With the correct safety gear and precise markings, you’re set for installation!
Step-by-step Installation Guide
Ready to make your kayak fishing trips even better? It’s time to install a custom fishing rod holder. This guide will walk you through each step with ease. You’ll have your rod holder ready for action in no time!
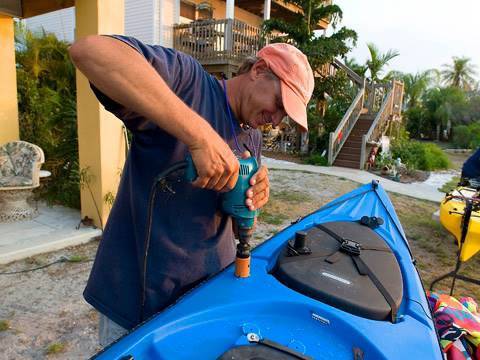
Drilling Mounting Holes
Choose the right spot on your kayak for the rod holder. Think about easy access and comfort while paddling and fishing. Mark the spot clearly before you drill.
- Get your drill ready with a bit that matches the holder’s mounting screws.
- Safety first: wear eye protection.
- Drill carefully and straight, creating holes where you marked.
- Clear away any plastic shavings for a clean work area.
Securing The Rod Holder
- Place the rod holder over the holes.
- Use rust-resistant screws to avoid future damage.
- Align everything and start screwing by hand to avoid cross-threading.
- Tighten the screws with a screwdriver until snug.
- Double-check that the holder is firm and does not wiggle.
And there you have it, your custom kayak fishing rod holder installed!
Customization Tips For Anglers
Customizing your kayak with a fishing rod holder boosts your angling prowess. It lets you troll with ease and keeps your gear secure. These tips will help tailor your kayak for the perfect catch.
Adjusting For Comfort And Reach
Finding the perfect spot for your rod holder means easy access and no strain. Consider these steps:
- Mount your rod holder within arm’s reach for optimal comfort.
- Ensure it’s angled for effortless casting and retrieving.
- Test the position before drilling, ensuring it does not impede your paddle stroke.
Remember, the right placement ensures efficiency and comfort during long hours on the water.
Adding Personal Touches
Make the holder truly yours with these ideas:
- Color-code your holders to match your kayak or fishing gear.
- Emblazon your name or design onto the rod holder for a unique mark.
- Add reflective tape or lighting for nighttime fishing safaris.
| Customization | Benefits |
|---|---|
| Colors | Style and Quick Identification |
| Engravings | Personalization |
| Lights | Safety and Visibility |
With these personal touches, your rod holder is more than functional – it’s a statement.
Post-installation Checklist
Once you have installed your new kayak fishing rod holder, it’s vital to perform checks. This ensures that your gear is safe and ready for an adventure. Our Post-Installation Checklist guides you through this crucial step.
Testing The Rod Holder’s Stability
Start by testing your rod holder’s stability:
- Wiggle the holder to check for any movement.
- Apply gentle pressure in different directions.
- Ensure the holder stays in place under stress.
- Load the rod to simulate actual fishing scenarios.
- Re-tighten any loose screws immediately.
Maintaining Your New Setup
Maintenance is key to the longevity of your rod holder:
- Rinse with fresh water after each use.
- Inspect all components regularly.
- Replace parts showing signs of wear.
- Store the kayak out of direct sunlight when not in use.
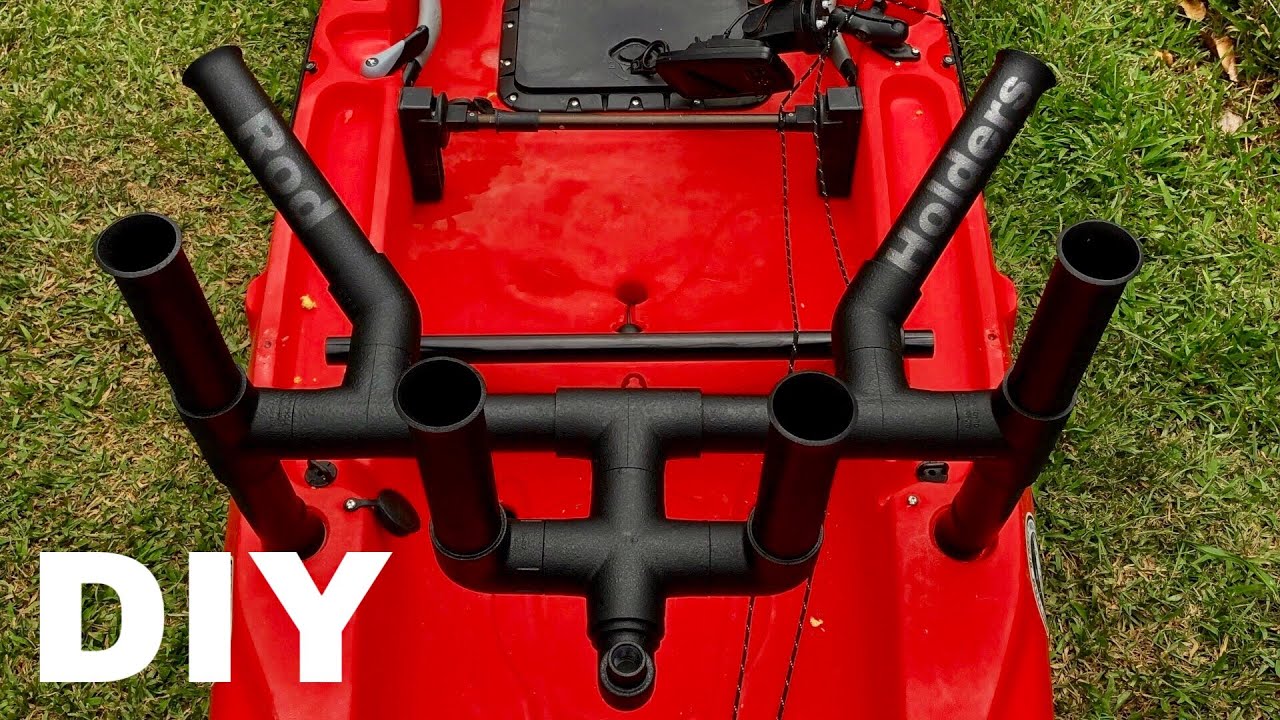
Credit: www.youtube.com
Advanced Modifications
Welcome to the ‘Advanced Modifications’ part of our guide on custom kayak fishing rod holder installation. After covering the basics, it’s time to dive into the niftier tweaks that can significantly enhance your angling experience. Get ready to transform your kayak into a fishing machine.
Integrating Additional Fishing Gear
Bolster your kayak with gear that steps up your fishing game. Consider these add-ons:
- Anchor Trolleys: Position your kayak in the current precisely.
- Electronic Fish Finders: Locate schools of fish effortlessly.
- Tool Holders: Keep pliers and knives within easy reach.
Ensure each piece mounts securely for safety. Use stainless steel hardware to prevent corrosion.
Diy Upgrades For Enhanced Functionality
Customize your rod holders with DIY upgrades. These changes can make a big difference:
- Adjustable Angles: Add pivoting bases for versatile rod positioning.
- Quick Access: Create bungee cord retainers for rapid rod release.
- Extra Protection: Attach rubber liners to shield your rods from scratches.
Utilize marine-grade materials. They last longer and withstand harsh marine environments.
| Modification | Benefit | Material Needed |
|---|---|---|
| Pivoting Bases | Flexible positioning | Metal hinges, screws |
| Bungee Cord Retainers | Quick rod access | Bungee cords, hooks |
| Rubber Liners | Rod protection | Industrial rubber strips |
Troubleshooting Common Issues
Every kayaker knows that custom installations bring their own set of challenges. Installing a custom kayak fishing rod holder can redefine your fishing experience. Yet, sometimes things don’t go as planned. Ready to tackle the common hurdles? Let’s dive into troubleshooting.
Handling Leaks And Water Entry
Stay dry and afloat with these tips:
- Use silicone sealant around the holder’s base.
- Check gaskets for proper fitting and wear.
- Regularly inspect for cracks and fix them immediately.
Keep an eye on these potential leak sources:
| Area | Checklist |
|---|---|
| Bolt holes |
|
| Holder’s joints |
|
Fixing Loose Fittings And Components
Your rod holder should be steadfast. Secure it right:
- Tighten all screws and bolts regularly.
- Use locknuts and washers for extra grip.
- Check the holder before every trip.
Stay ahead of loose fittings:
- Confirm the compatibility of all parts and accessories.
- Replace worn-out pieces with exact matches.
- Test the setup on land before hitting the water.
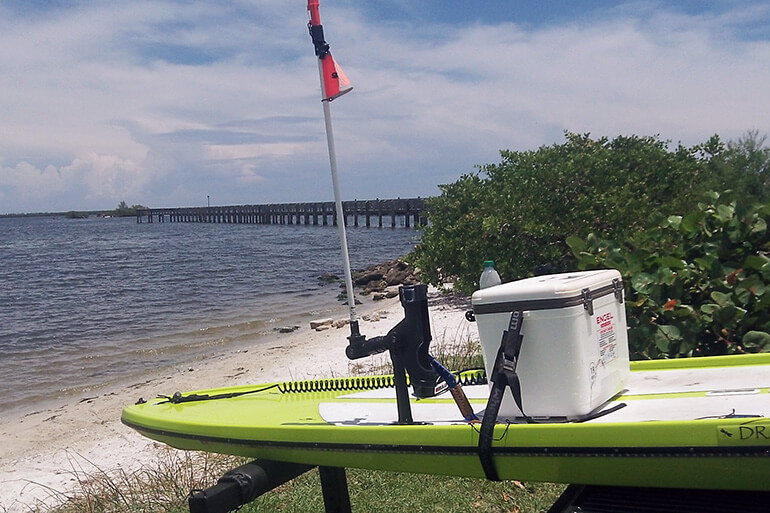
Credit: www.floridasportsman.com
Final Thoughts
Embarking on the installation of a custom kayak fishing rod holder marks an exciting step towards personalized angling adventures. Armed with newly acquired skills and a bespoke setup, you’re ready to take on the waters with confidence and efficiency.
Reflecting On The Installation Process
With the rod holder in place, consider the journey you’ve traversed. The careful selection of tools, the meticulous following of instructions, and the joy in securing the last screw – each step was a building block towards a stronger fishing game.
- Measured twice, installed once: precision paid off.
- Choosing the right spot: accessibility meets comfort.
- Customization for the win: Your kayak now mirrors your fishing style.
Future Considerations For Kayak Upgrades
As you revel in your current accomplishments, it’s natural to look ahead. Your kayak is a canvas for innovation, and each accessory can refine your fishing experience.
| Upgrade | Benefit | Consideration |
|---|---|---|
| Electronic Fish Finder | Locate your catch efficiently | Power source and mount |
| Additional Storage | Room for extra gear and catches | Weight distribution |
| Improved Seating | Enhanced comfort on long trips | Adjustability and support |
Whether it’s integrating new tech or optimizing for comfort, each future modification brings you closer to your ideal fishing sanctuary. Dream up, gear up, and paddle forth!
Frequently Asked Questions On How To Install A Custom Kayak Fishing Rod Holder
Which Kayak Rod Holder Is Best For Fishing?
When choosing a kayak rod holder for fishing, consider the type of fishing, kayak compatibility, and material durability. Look for a holder that allows for quick access and secure storage, often one that can be fully adjusted for angle and direction.
Can You Install A Rod Holder Without Drilling?
Yes, you can install a rod holder without drilling by using clamp-on or suction-based holders. These options are great for avoiding permanent modifications and are usually easy to adjust or remove when not in use.
What Tools Do I Need To Install A Kayak Rod Holder?
To install a kayak rod holder, you’ll typically need a drill, a saw to cut the mounting hole, marine sealant, screws, and sometimes a rivet gun. Always check the installation instructions for specific tool requirements.
How Do I Choose Kayak Rod Holder Placement?
Choosing placement for a kayak rod holder involves considering your paddling motion, fishing technique, and kayak layout. Optimal placement is within easy reach yet out of the way of paddle strokes and casting movements.
Conclusion
Are you ready to embark on your next angling adventure? By following the steps outlined, your kayak will now boast a custom fishing rod holder tailored to your needs. Embrace the water with confidence, knowing your gear is secure and within easy reach.
Happy fishing and tight lines!
