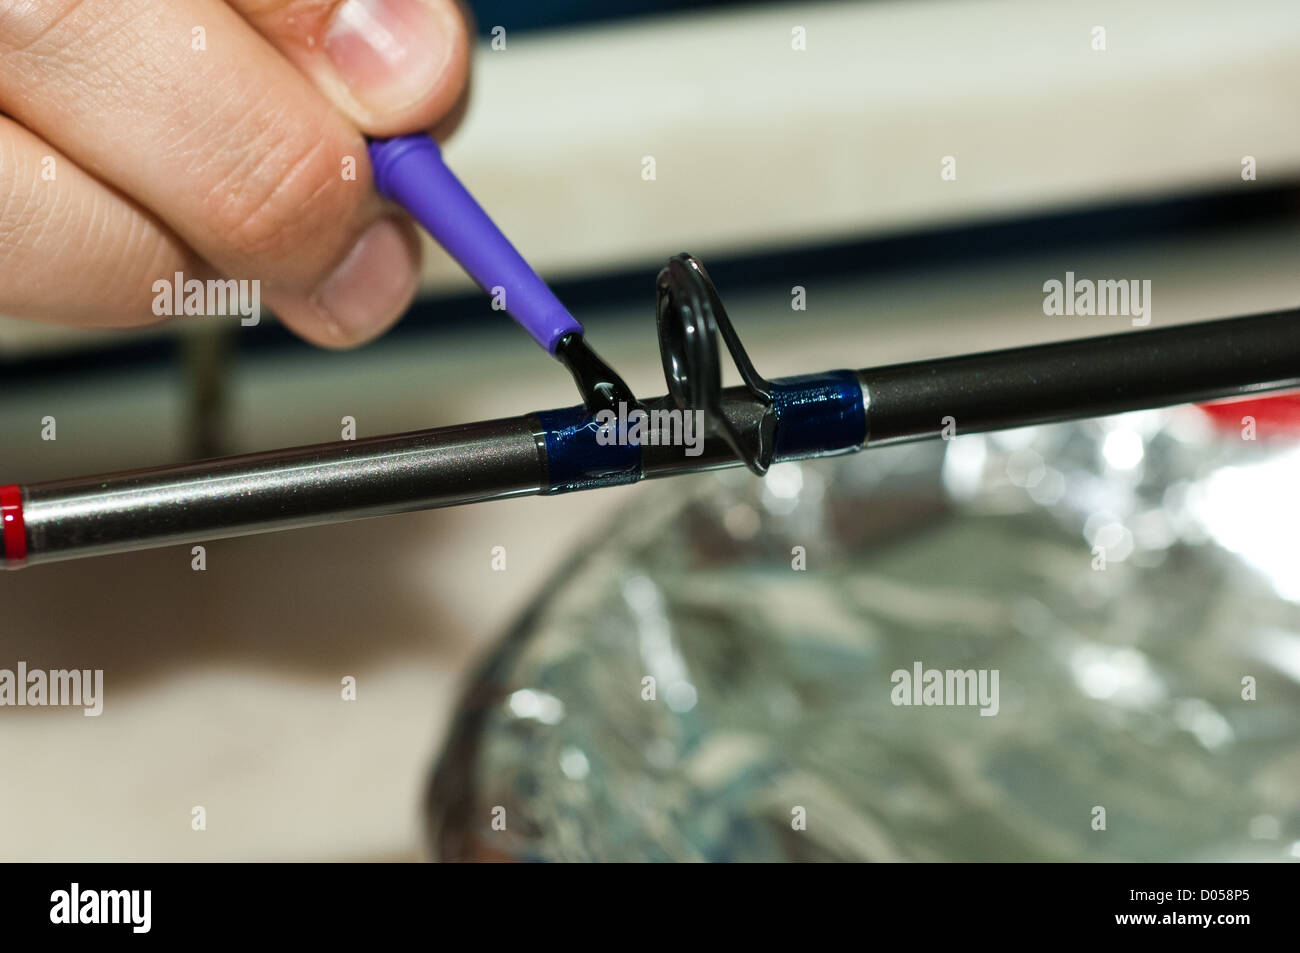
To secure fishing rod guide wraps with adhesive, apply a thin, even coat of epoxy to the thread wraps. Use a brush or applicator for precision and ensure complete coverage for lasting hold.
Securing fishing rod guide wraps with the right adhesive is crucial for a successful fishing trip. Epoxy is the go-to adhesive for anglers, known for its strong bond and waterproof properties. The application process is straightforward but requires a steady hand and attention to detail.
It not only protects the thread wraps from the elements but also secures them against the stress of repeated casting and retrieving. A well-applied adhesive prevents fraying and maintains the integrity of the fishing rod, letting you focus on the catch rather than equipment malfunctions. Emphasizing the importance of good technique and the right materials reinforces the durability and performance of your fishing gear.

Credit: www.alamy.com
Introduction To Securing Fishing Rod Guide Wraps
Securing fishing rod guide wraps is a crucial step in rod maintenance. It ensures your line glides smoothly, and your tackle performs at its best. Learn the ins and outs of applying adhesive for guide wraps. This foundation allows for uninterrupted fishing adventures, and peak rod performance.
The Importance Of Secure Guide Wraps
Guide wraps hold the fishing line guides to the rod. A strong bond between the guide and the rod is vital. It prevents the guides from loosening. Secure guide wraps mean accurate casts, fewer tangles, and a longer life for your fishing rod. Let’s delve into why securing these wraps deserves your attention.
Common Challenges In Guide Wrap Adhesion
Achieving a lasting bond might seem straightforward. Yet, many anglers face challenges. Improper surface preparation, selecting the wrong adhesive type, or environmental factors can affect adhesion. Understanding these pitfalls can greatly improve the end result.
Typical Adhesion Challenges:
- Moisture: Can cause weak bonds.
- Dirt or Oil: Prevents the adhesive from sticking.
- Incompatible Adhesives: Not all adhesives work for every rod material.
- Temperature Extremes: Can compromise the adhesive’s effectiveness.
Types Of Adhesives For Guide Wraps
Guide wraps secure the fishing rod rings, enhancing your fishing experience. Different adhesives cater to anglers’ unique preferences and requirements. Knowing your options ensures a strong bond that withstands the rigors of casting and reeling in the big catch. Let’s explore.
Epoxy: The Angler’s Choice
Epoxy resin stands out as the top option. Its remarkable properties include:
- Durability against water and UV exposure
- Exceptional adhesion strength
- Protective flexibility under pressure
Prepare the surfaces before application. Mix the resin and hardener as directed. Apply a thin coat using a small brush. Allow it to cure as specified.
Alternative Adhesive Options
Other adhesives are available too. Consider these:
| Type | Usage | Pros |
|---|---|---|
| Color Preserver | Before epoxy | Maintains thread color, easy to paint |
| UV-Curable Resins | Quick fixes | Sets instantly with UV light |
| Hot Melt Glue | Temporary holds | Easy removal, fast setting |
Test adhesives on a scrap piece to ensure compatibility.
Preparing The Rod For Adhesive Application
Securing your fishing rod guide wraps with adhesive is crucial. It determines the durability and functionality of your rod. Proper preparation ensures a smooth application process. This can ultimately affect your fishing success. Follow these steps to ensure your rod is ready for adhesive.
Cleaning The Rod Surface
Start with a clean slate. Clean the rod surface to ensure the adhesive bonds properly. Use these steps:
- Remove dust: Wipe the rod with a soft, dry cloth.
- Apply cleaner: Use a mild detergent or rod cleaner on a damp cloth.
- Rinse thoroughly: Wipe off any soap residue with a clean, damp cloth.
- Dry: Pat the rod dry with a lint-free towel.
Alignment Of The Guides
Correct guide alignment is critical. Follow these steps:
- Place each guide on the rod snugly.
- Use a ruler or measuring tape for even spacing.
- Double-check alignment visually.
- Temporarily secure guides with masking tape if needed.
Ensure everything is in place before applying adhesive. This prevents mistakes and rework. Take your time for the best results.

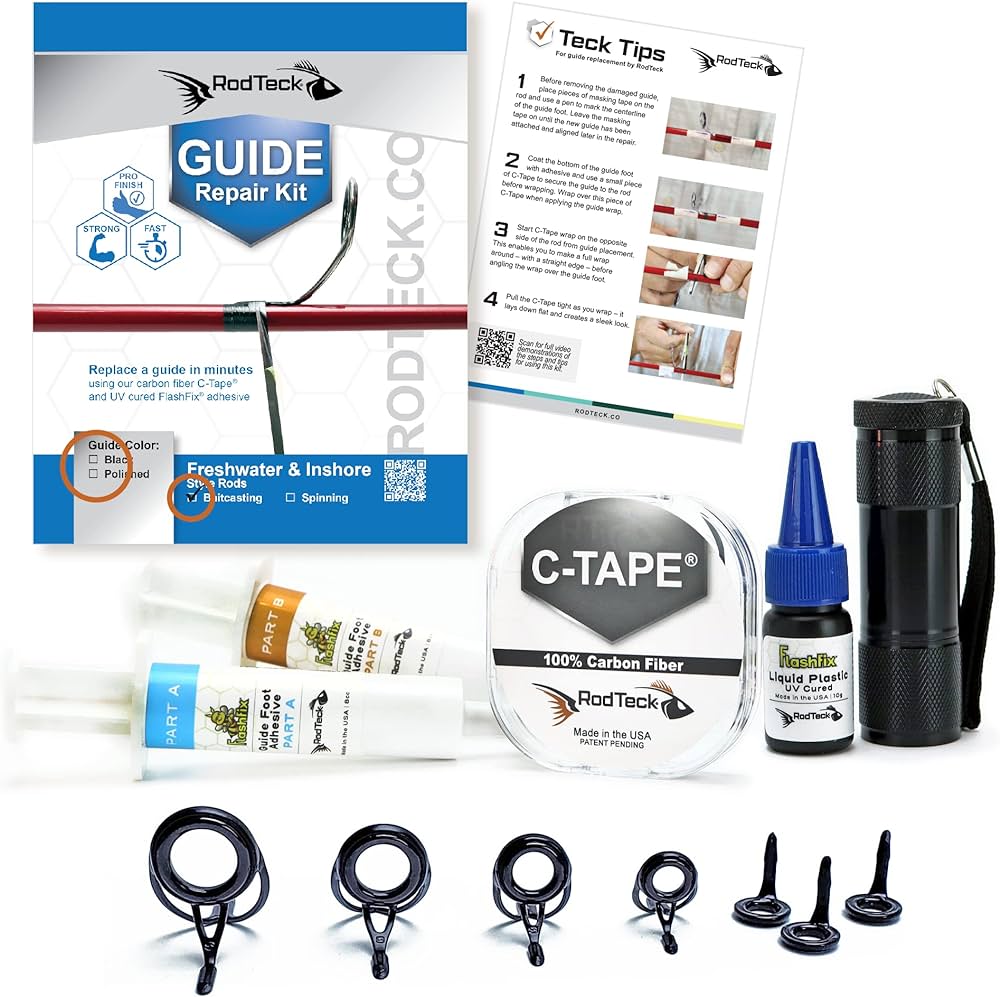
Credit: www.amazon.com
Step-by-step Guide Wrap Adhesion
Step-by-Step Guide Wrap Adhesion is crucial for securing your fishing rod guide wraps properly. Applying adhesive accurately ensures the longevity and performance of your rod. This simple process can prevent the guide wraps from unraveling and keep them in top condition.
Starting The Wrap
Preparation is key before beginning any wrap. Cut a length of thread. Hold it against the rod. Loop it to form a simple knot. Place the knot above the guide foot. Start to wrap over the tag end of the thread. Perform several tight wraps. Trim the tag end close to the wrap.
Applying The Adhesive Evenly
Choose the right adhesive for the best results. A thin coat works best. Use a small brush or syringe for precision. Start from one end of the wrap. Gently apply the adhesive. Ensure even coverage by brushing along the length of the wrap. Let it cure according to the manufacturer’s instructions.
Following these straightforward steps can result in a durable and secure guide wrap on your fishing rod. This will enhance your fishing experience significantly.
Curing Time And Conditions
Curing time and optimal conditions are critical for securing fishing rod guide wraps with adhesive properly. After applying adhesive to your guide wraps, it’s crucial to allow adequate time for the product to set and harden. This step ensures your fishing rod remains durable and ready for any challenge on the water.
Temperature And Humidity Considerations
The temperature and humidity in the environment where the adhesive cures can significantly affect the outcome. Aim for these conditions:
- Mild temperature: between 65-85°F (18-29°C).
- Controlled humidity: ideally around 50%.
Extreme cold or heat can lead to adhesive failure or extended curing times. Maintaining these parameters ensures the strongest bond for your guide wraps.
Patience During The Curing Process
Patience is imperative when waiting for guide wrap adhesives to cure. Depending on the product:
- Allow at least 24 hours for initial curing.
- Wait several days for complete curing.
Do not rush the process. Using the rod too soon may weaken or damage the bond, leading to potential guide wrap failure during use.
Troubleshooting Common Adhesive Issues
Sometimes, securing fishing rod guide wraps can be a tricky task. Managing adhesive issues is the key to a perfect wrap finish. This section will help you troubleshoot common problems and ensure your guide wraps last through many successful fishing trips.
Air Bubbles And How To Remove Them
Air bubbles can form when applying adhesive to secure guide wraps. Bubbles disrupt the smooth look and could weaken the hold. To address this, follow these steps:
- Use a razor to gently slit the bubble.
- Press the air out with a flat object, like a credit card.
- Apply a tiny drop of adhesive into the slit.
- Allow it to dry completely before continuing.
When Adhesive Doesn’t Set
It’s frustrating when your adhesive won’t set. Here are some quick fixes:
- Check the expiration date of the adhesive.
- Mix the adhesive components correctly.
- The room temperature can affect setting. Ensure you work in an ideal environment.
- If it’s still not setting, remove the guide wrap and start over with a new adhesive.
Post-adhesive Application Care
Once you’ve secured your fishing rod guide wraps with adhesive, caring for them correctly is crucial. Proper post-adhesive application care ensures lasting hold and protection. Let’s explore some essential tips for handling and maintaining your fishing rod after applying adhesive.
Handling The Rod After Adhesion
Handle your fishing rod with care right after applying adhesive:
- Be gentle when touching the wraps.
- Allow the adhesive to cure fully, often taking 24 hours.
- Avoid using the rod or getting it wet during this period.
- Store the rod in a horizontal position to prevent sagging.
- Keep the rod away from heat sources and sunlight as they may affect the adhesive’s curing process.
Long-term Maintenance Tips
| Care Tips | Benefits |
|---|---|
| Clean regularly | Prevents dirt buildup and adhesive degradation |
| Inspect wraps often | Identifies potential issues early |
| Avoid high temperatures | Preserves the adhesive quality |
| Use rod sleeves | Protects from physical damage |
Regular cleaning with a soft, damp cloth can extend the life of your rod wraps. Inspect the adhesive areas often for signs of wear or damage, and always store your rod in a cool, dry place. From time to time, apply a light coat of rod varnish to renew protection. Protecting your fishing rod’s guide wraps is essential for an enjoyable angling experience.

Credit: www.fishtrack.com
Advanced Techniques And Tips
An enthusiast diving into the world of custom rod building discovers the importance of securing fishing rod guide wraps. Advanced techniques and tips elevate the durability and aesthetic appeal of the wraps. Exploring different methods ensures guides remain firmly in place. Simultaneously, these techniques enhance the rod’s visual craftsmanship. Here are insights into some advanced strategies for a result that blends form with function.
Working With Color Preserver
Color preservers maintain the vibrancy of thread wraps on fishing rods. Follow these steps to apply it effectively:
Clean the thread wrap area before application.- Apply a thin coat of color preserver with a dedicated brush.
- Allow the first coat to dry completely before adding a second layer.
- Test for tackiness between coats.
Maintain an even application to prevent unsightly blotches. Proper use of color preserver helps thread colors stay true after exposure to the elements.
Creating Decorative Wrap Patterns
Decorative wraps include artistic flourishes to a fishing rod. They showcase the rod builder’s skills. Create these patterns effectively by:
| Step | Tip |
|---|---|
| Choose Thread | Select threads of varying colors and textures. |
| Plan Design | Sketch the pattern layout before starting the wrap. |
| Secure Base Layer | Apply a base wrap to hold the decorative threads in place. |
| Weave Patterns | Meticulously weave threads to form the desired pattern. |
| Cement Finishing | Use adhesive to secure and finish the wrap design. |
Practice and patience help achieve perfect decorative wrap patterns. These embellishments set custom rods apart from factory-made counterparts.
Frequently Asked Questions Of How Do You Secure Fishing Rod Guide Wraps With Adhesive?
What Is A Fishing Rod Guide Wrap?
A fishing rod guide wrap is a thread wrapping that secures the guide to the rod. It provides a smooth surface for fishing line to glide over. Proper wrapping ensures durability and performance of the rod.
How Do You Apply Adhesive For Guide Wraps?
To apply adhesive, coat both the rod’s surface and the guide’s feet with a thin layer. Let the adhesive become tacky. Position the guide and start wrapping tightly to secure it in place. The adhesive ensures a strong bond.
What Is The Best Adhesive For Securing Rod Guides?
The best adhesive is one that offers flexibility, strength, and water resistance. Two-part epoxies or specialized rod-building glues are top choices among anglers for their durability and long-lasting properties.
Can You Reapply Adhesive To A Loose Guide Wrap?
Yes, reapplying adhesive to a loose guide wrap is possible. Carefully remove the old wrap and adhesive, clean the area, then apply new adhesive and re-wrap the guide. This will restore the guide’s security on the rod.
Conclusion
Securing your fishing rod guide wraps with adhesive needn’t be a daunting task. With the right technique and materials, longevity and durability are assured. Remember, patience and precision are your best tools. Happy fishing, and may your gear be ever steadfast!

